 ¥Learn how to use a compressor to pump and swell a drum beat.
Pumping and Swelling Drum Beats using Compressors video tutorial explains how to pump and swell drum beats using a variety of different compressor designs.
If you listen to Hip Hop and Grime you will notice drum beats that swell and pump to the rhythm. In fact, some of the processing is so heavy that the swelling comes across as glitchy and dirty – exactly what we want!
We achieve the pumping or swelling effect by using a compressor with pretty extreme settings. The traditional way of getting drum beats to swell and pump is to use the compressor’s side-chain and have an external trigger triggering the compressor that is placed on the drum beat channel within the DAW. The shape or response of the external trigger shapes the compressor’s behaviour and therefore alters the shape of the drum beat being compressed. However, you don’t have to use the side-chain feature of a compressor to make a drum beat swell or pump. You can use a compressor as is and time is such that it pumps to the rhythm and swell on the beat.
To be able to achieve this type of effect with a compressor we need to understand how a compressor works. If you are still uncertain on what the parameters of a traditional downward compressor do then this FREE video should help:
Compression – Science and Application
When creating the swell effect we need to set the threshold such that it encompasses the entire audio signal, or as much of it as possible, and to then use fast attack and release values and with a large ratio. The higher the ratio value the more swelling that takes place. The attack can be altered to allow peak transients to come through which helps to keep the drum beat’s attack focused, and the release can be altered to allow for the swelling effect to decay. In effect, what we are trying to achieve is a hyped over-compressed signal that is shaped by the attack and release parameters of the compressor. Different compressor topologies result in different responses and textures. For example: using a tube based compressor can add heavy amounts of saturation to the drum beat and that can make it sound thick and dirty. Alternatively, using a FET compressor can result in a bright and snappy type of texture. In the tutorial, I use 5 different types of compressors and show you how easy it is to achieve different textures just by using different compressor topologies.
In the Pumping and Swelling Drum Beats using Compressors video, I run a drum beat through 5 different types of compressors. I show you how each compressor works and how to use it to achieve the swell and pump effects. I explain what settings to use for each compressor to achieve the desired textures. I explain all the processes step by step and for each compressor type.
Plugins used in this video:
- FabFilter Pro C2
- Tubetech CL1B
- PSP BussPressor
- Slate FG-Grey
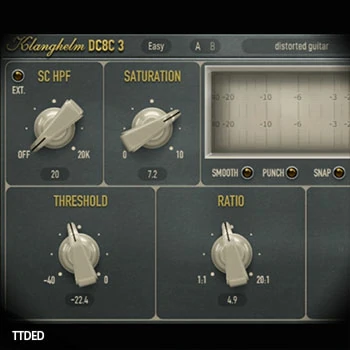
- Klanghelm DC8C2
Topics covered in this video are:
- Understanding Pump and Swell
- Timing and Sync
- Threshold and Release Techniques
- Coloured to Transparency
- Various Compressor Topologies
- Pushing and Pulling
- Warm and Grit
- Transient Control


评论0